Getting Started
The Arduino IDE is the most popular beginner method for programming compatible microcontrollers.
Download the Arduino IDE from the Arduino website:
https://www.arduino.cc/en/Main/Software
Adding the 3DoT Board to Arduino
- Navigate to File / Preferences
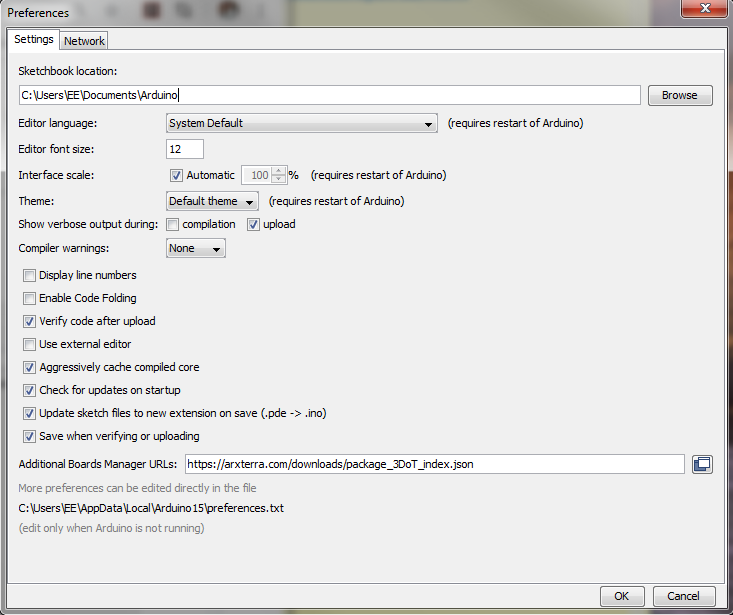
- Paste the following link into Additional Board Manager URLs: https://arxterra.com/downloads/package_3DoT_index.json
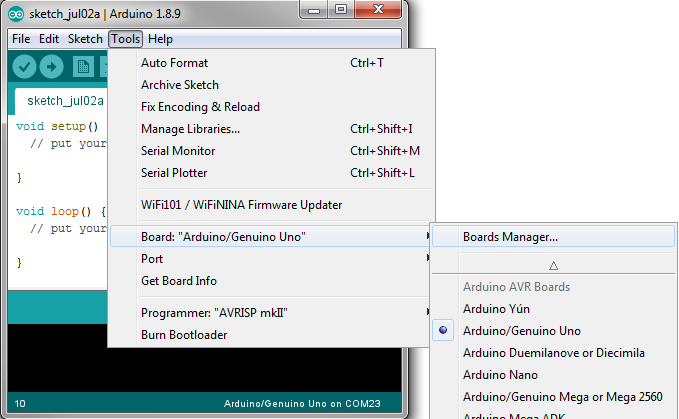
- Close the preferences window and navigate to Tools / Board: / Boards Manager…
- Type “3DoT” in the search bar. The board Should show up.
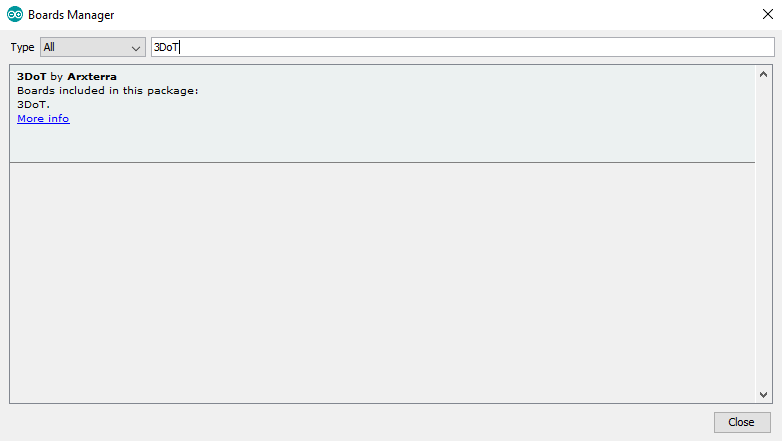
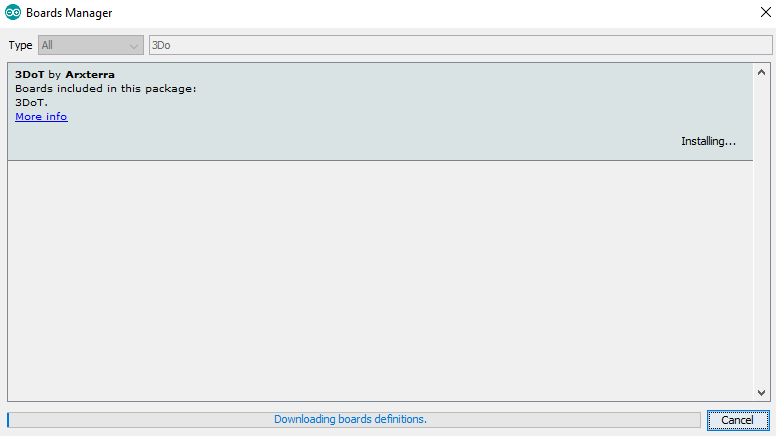
- Click inside of the box that contains the text “3DoT by Arxterra” and the “Install” button should appear. Click Install.
Installing the 3DoT Arduino Library
In the Arduino IDE, navigate to
Sketch > Include Library > Manage Libraries..
Search for ArxRobot Library and click install. Done!

Uploading Your First Sketch
With the Library Installed, navigate to File > Examples > ArxRobot Library and click on ArxRobot_Basic
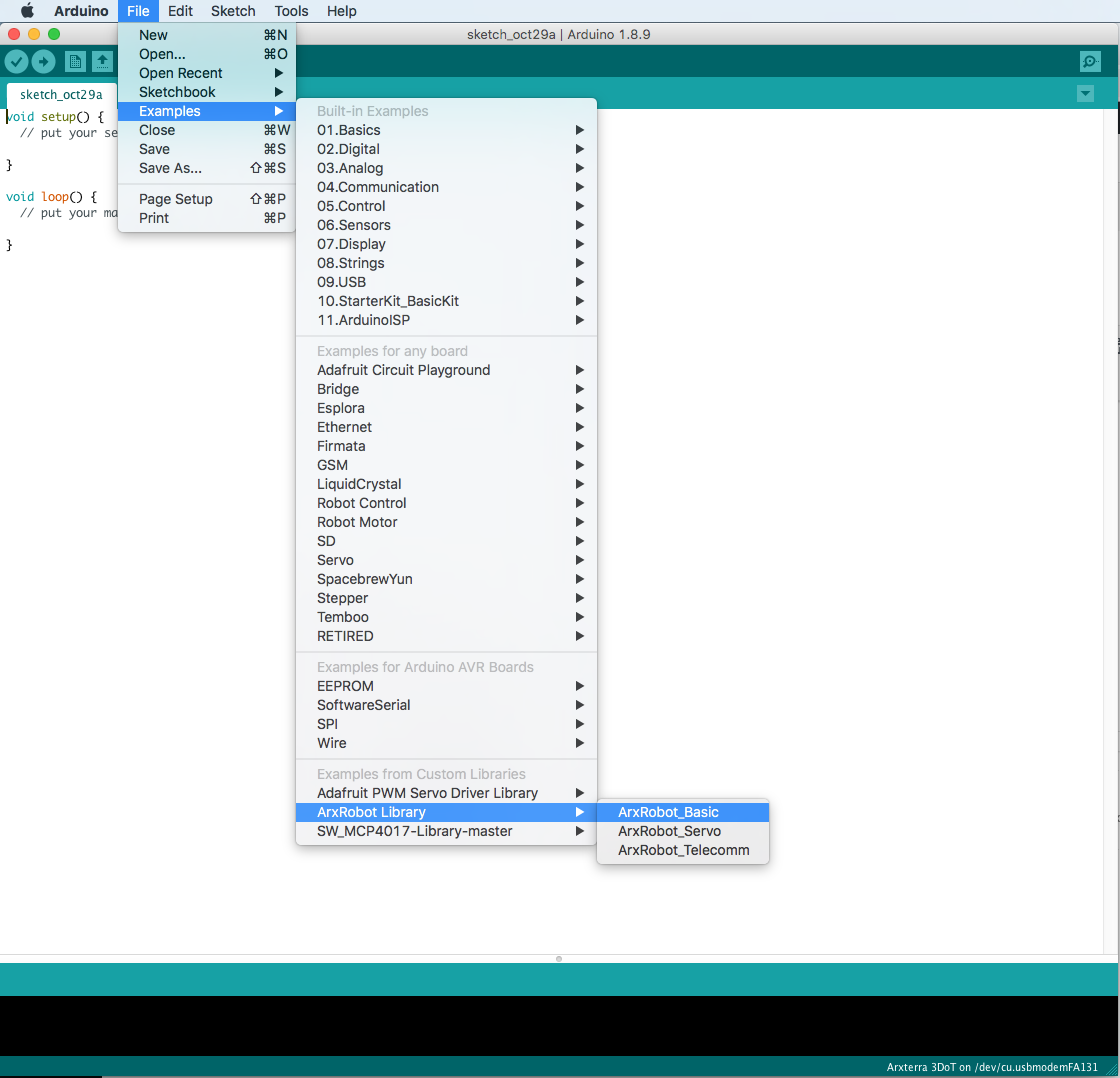
The ArxRobot_Basic example is a barebones sketch that handles all the background robot operations, including Bluetooth commands. This means that uploading the Basic example code will make your robot ready to connect to Bluetooth and go!
Select a COM port
- Set the 3DoT to PRG mode and connect your 3DoT to your computer with a USB cable
- Navigate to Tools > Port and select the port labeled as a 3DoT board.
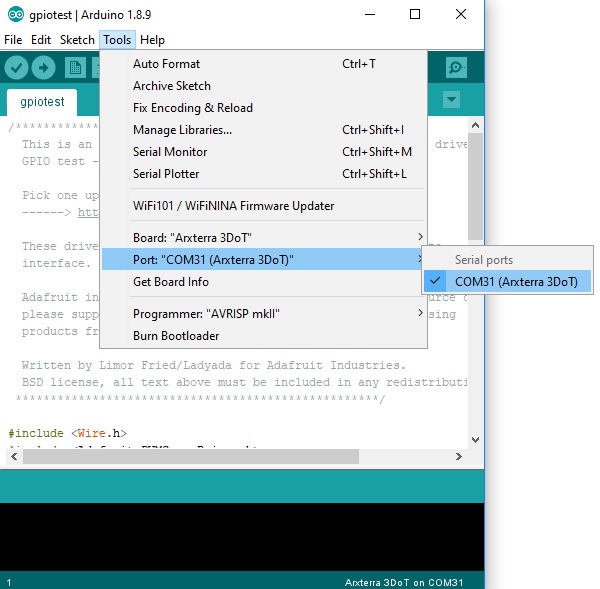
Then, simply hit the Upload button in the Arduino IDE.
Note
If a sketch fails to upload, check the COM port selected again. Your computer may change the COM port number as the board is turned off/on
Next Steps
Congratulations! You uploaded your first sketch to the 3DoT Board. Click the next button to learn how to send commands to your 3DoT using the RoboPilot app.